When Should My Company Invest in Robotic Welding?

Contributed by the experts at OTC Daihen

When you’re running a production facility, it can be hard to know when it’s the right time to invest in robotic welding automation for your assembly line. 

The questions can add up: When is the right time to make the switch? Can I justify the cost? How much downtime will be involved? Will the quality be a concern?

Use the questions and tips in this article to help you determine the right move for your production line.

Signs It’s Time to Buy a Welding Robot

There can be any number of reasons to buy a robotic welding system, but how do you know when you should take the plunge? Here are a few questions to ask about your business:

  • Has there been a decrease in available skilled welders in your area?
  • Are hourly rates going up because of increased costs of living? 
  • Are you starting to produce items that would be too difficult for an average welder to reach or weld effectively or safely? 
  • Are you spending too much time/money training welders and have a high turnover in that job?
  • Are you unable to take on the jobs you really want because of limited production capacity?

All of these are signs that you may be a good candidate to automate your line or potions of your line with robotic welding. 

The Welding Labor Shortage

The dwindling skilled labor pool is one reason that many companies are making the switch to automation. According to Tradesmen International, the shortage of welders is predicted to hit a deficit of 400,000 workers by 2024.

Also, many manufacturers are seeing their most skilled welders retire or approach retirement. In fact, the average age of a welder is 55, with 80 percent of welders over age 35.

“Some welding companies are supporting trade schools and driving kids back into welding, but those things aren’t going to take effect for a decade,” said Chris Sharp, Regional Sales Manager for OTC DAIHEN. “It’s going to get worse before it gets better.” 

How Much Does a Welding Robot Cost?

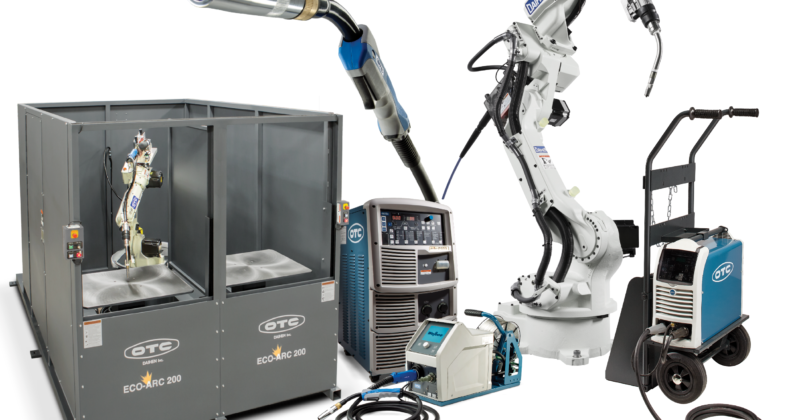
This is always a top question, and the answer is: it just depends. Robotic welding systems can range from around $40k to $250,000k+, depending on the model, features, and production levels. There is a wide price range because there truly are robotic welding solutions to fit every size and budget.

No company is too big or too small to look at investing in a robotic welding solution. The questions to ask are: Do you have a problem with labor or quality? Are you trying to increase your throughput? Are you trying to be more competitive in the marketplace? Are you looking to reduce manufacturing costs?

Robotic welding has a proven ROI as it helps manufacturers overcome the labor shortage, demands for faster production and a need for more capacity or advanced skills to fit complex new jobs on the line.

How Can I Justify the Cost of Automation?

Even once you feel it’s time for your company to try robotic automation, the perceived cost may hold you back. However, instead of making a decision based entirely on the sticker price of that shiny new piece of equipment, it’s more important to understand the ROI of robotic welding.

By far, labor is the biggest cost for manufacturing companies. If the average welder wage is $25 an hour, and you add in benefits, that’s costing you about $50 per hour. Combine that with the inefficiency and inconsistency inherent in human work and the costs quickly add up. 

“Most frequently, we see a robot pay for itself in labor savings costs in about 24 months,” said Sharp. “As soon as they pay off the robot, it’s just windfall. And that’s where the savings kick in.”

A smart way to help pay off that robot cost quickly is to amortize it across costs for your next job. For example, depending on the cost of a part, you might add $10 per part to your proposal. Spread over hundreds or thousands of parts, that can quickly help you realize a return on your investment. 

More Ways to Justify a Robot Purchase

Knowing when to buy a welding robot for your assembly line is important to keep your business operating successfully and economically. Justifying the purchase to other departments or executives is just as important. 

A discussion with you Sales Engineer is a great place to start. You will gain an understanding of what you can expect to invest and what the return will be compared to your current method.

Considering a Robotic Welder or Robotic Welding Cell? EXPLORE what OTC Daihen has to offer.

7 Effective Ways to Spend End-of-Year Budget


Don’t let your end-of-year budget go to waste.

The New Year is around the corner and you may be looking for effective ways to spend your end-of-year budget. Hit the ground running on Jan. 1 and positively impact your production capability going into the New Year!

Click below for purchasing ideas to get ahead in 2021:


#7 Tooling

Critical Checkpoints on Your Band Saw

To avoid downtime it is helpful to know your band saw’s specific checkpoints. Refer to your machine’s manual for factory recommendations and use the list below as a guideline to develop a PM schedule.


Quick Reference Shopping List:
  • New blade
  • Sawing fluid and lubricants
  • Band wheel bearings
  • Band guides
  • Drives
  • Belts
  • Vises

HOW TO COMPENSATE FOR PRESS BRAKE DEFLECTION

Content contributed by:

If you own a press brake that is eight feet or longer, chances are you’ve experienced press brake deflection. Press brake deflection is when the ram and bed flex under load. Most modern press brakes are powered by two hydraulic cylinders on either end and are supported by side frames, meaning that both the power and support are isolated to either end of the machine. This results in the machine being the strongest and most rigid at the two ends. As a result of this design, ram and bed deflection is a normal part of press brake operation. Ram and bed deflection occurs most dramatically in locations farthest away from the hydraulic cylinders; in other words, it is most noticeable in the middle of the press brake.

DEFLECTION: the ram and bed deflect in the shape of an arc,
as a result the angle produced will be more obtuse in the center of the work piece

While press brake deflection is a natural occurrence in modern press brake operations, it can pose challenges to getting consistent bend angles, particularly across the entire length of long parts. Because the ram and bed deflect in the shape of an arc, the angle produced will be more obtuse in the center of the work piece, or at the peak of the arc. For instance, imagine you are bending a 90° angle across the length of a 10 foot part. While the ends of the finished part may be an accurate 90°, you could end up with as much as a 98° bend angle in the center. This phenomenon is known as the “canoe effect.”

There are a variety of methods used to compensate for press brake deflection, some of which are more effective than others.

Shimming

Shimming is the most basic method of compensating for press brake deflection and is achieved at the operator level. perators incrementally insert thin pieces of metal, paper, or cardboard underneath the dies. This process adds height to the dies in areas where your bend angle is greatest, closing up the produced angle. Shimming is an extremely time consuming and inconsistent process. It should be avoided at all costs, serving only as a last resort when all other methods have been exhausted. Shimming is an art form that requires a skilled and experienced operator. However, even when performed by the most skilled operators, it typically requires multiple test bends, which result in excess scrap material and can eat up valuable production time. It is also worth noting that shimming can lead to premature wear on tooling and other components. Find out how much shimming is costing you.

Servo-Electronic Pulley Press Brakes

Some modern press brakes utilize a servo-electronic pulley system that can often eliminate press brake ram and bed deflection. Because the design distributes force more evenly across the full working length of the machine, deflection is virtually nonexistent when used properly. What does “proper use” entail? Most machines require the use of dies with V-openings that are equal to eight times the material thickness. When using V-openings of less than eight times the material thickness, deflection may still occur. Check with the manufacturer for the recommended use for maximum accuracy.

SafanDarley servo-electric brake – talk to your FMA Sales Engineer about these effective machines.

Hydraulic Crowning

Some press brakes come from the factory with hydraulic crowning already built in. Hydraulic crowning uses hydraulic cylinders located in the bed of the machine. As the cylinders are filled with hydraulic pressure, they exert an upward force on the bed of the machine to compensate for deflection. Modern hydraulic crowning systems often feature what is known as dynamic crowning. Dynamic crowning provides a unique benefit of monitoring inconsistencies and resistance during the bending process, allowing for it to make real time adjustments to correct not only inconsistencies in the press brake but inconsistencies in the material as well.

WILA Hydraulic Crowning Unit

Mechanical Crowning

By far the most common solution to compensating for deflection is mechanical crowning systems. Mechanical crowning systems are installed in place of a bottom tool holder, as they also serve this function. They typically feature either mechanical or hydraulic clamping as options. They also typically feature different drive designs, from analog to digital readouts and from hand crank assemblies to CNC motors. Mechanical crowning systems can typically be outfitted to the press brake at the time of purchase, as well as after the purchase in the form of a retrofit. Mechanical crowning systems vary in design, accuracy, and ease of use from product to product. Unless your press brake has a hydraulic crowning system, a mechanical crowning system will probably be the solution you need to compensate for deflection. Don’t make the mistake of assuming all mechanical crowning systems are made equal and buying just any system.

WILA Mechanical Crowning Unit

Consider your applications, your challenges, and determine the set of features you need to increase your productivity and efficiency before making the investment. Questions or need to brainstorm? Your FMA Sales Engineer is here to HELP.

The CARES Act: An Opportunity to Bounce Back Stronger Than Ever

How revisions to NOLCB open up an opportunity to invest in machinery in 2020.

The Coronavirus Aid, Relief, and Economic Security (CARES) Act contains provisions to the US law as a result of COVID19. You have most likely read about, or directly interacted with, parts of the new laws involving insurance coverage, unemployment, and adjustments for loans, taxes and grants. Additionally, the CARES Act includes support for the global COVID19 response, paid sick leave, nutrition assistance and other programs and efforts. For S-Corps, C-Corps and LLC’s there is one edit to the federal tax laws which you may find interesting. Net Operating Loss Carryback (NOLCB) is a standing law that gives the ability for companies to deduct their current year tax losses against income from a prior tax year.

5 Steps to ensure your Lockout/Tagout procedure is OSHA Compliant

Lockout devices are designed to keep energy-isolating knobs and buttons in the “off” position, preventing machines and equipment from becoming energized. Most often utilized during maintenance procedures or malfunctioning situation, Lockout/Tagout (LOTO) procedures aim to prevent hazardous energy from causing injury or death. While our service department most commonly deals with electrical, hydraulic and pneumatic energy, it is important to consideration LOTO procedures for any thermal and chemical energy on your shop floor.

OSHA defines lockout/tagout (LOTO) as a “specific set of practices and procedures to safeguard employees from unexpected energization or startup of machinery and equipment, or the release of hazardous energy during service or maintenance activities.” Unfortunately, failure to comply with LOTO ranks in OSHA’s top 10 most frequently cited standards.

Take some time to review your procedures and follow these 5 steps to work towards an OSHA Compliant LOTO Procedure:
  1. Develop procedure. The development of a lockout/ tagout procedure must be a collaborative effort. Documentation must be thorough and made accessible to your entire team. While a detailed plan helps to clarify any confusions, many recommend a quick reference sheet be posted on the shop floor.
  2. Write out machine and task-specific procedures. While the LOTO concept is the same for every machine that produces hazardous energy, your written procedures should give instruction for locking out every piece of equipment on the floor. Specific instruction for shutting down, isolating and securing each machine should be available in an emergency and clear to those not familiar with a machine. Procedures should include steps for the placement, removal and transfer of lockout/tagout devices.
  3. Identify and mark energy-isolation points. All energy-control points on every machine should be labeled and or tagged using a standardized system. This includes valves, switches, breakers and plugs. Ideally the labels and tags refer back to the detailed instruction in your LOTO Procedure.
  4. Acquire the proper lockout/tagout devices. A variety of lockout/tagout devices, for all types of application, are available online. A quick Google search will give options for everything from circuit-breaker lockouts and valve lockouts to multiple types of handle lockouts. Make sure you have the necessary lockouts devices should you need them.
  5. Lockout/tagout training and audits. Once procedures are written and energy-isolation points are labeled, take the time to train your employees on your LOTO procedure. This training should included OSHA guidelines and touch on the procedure for each machine on your shop floor.
  6. Lockout/tagout training and audits. Once procedures are written and energy-isolation points are labeled, take the time to train your employees on your LOTO procedure. This training should included OSHA guidelines and touch on the procedure for each machine on your shop floor.

When it comes to developing a lockout/tagout procedure, OSHA outlines what a typical lockout procedure looks like in the 1910.147 App A Standard. The team in Fox Machinery’s service department are happy to answer any questions you may come across developing your LOTO Procedure.

Ensure Peak Performance for your Bandsaw

Article Contributed by:

In this handy guide, the experts at Dake give suggestions and reminders on properly caring for your bandsaw.

The Benefits of Proper Maintenance

Ensuring that you perform the appropriate maintenance on your vertical or horizontal bandsaw will help prevent costly problems and downtime in the future. Additionally, this attention boosts productivity levels, improves the lifespan of the bandsaw blade, and helps to produce higher quality cuts.

An easy comparison: chefs sharpen their knives regularly so that they can cut meats, vegetables, and other food products with ease and precision. A dull knife can lead to a very messy cutting board and some haphazardly sliced pieces of produce. While the average household may not sharpen their knives often, professional chefs are expected to maintain a clean edge of their bladed tools. The same can be said for metalworkers using bandsaws. Whether you prefer a vertical or horizontal model, they need to be tended to regularly in order to cut at peak performance.

Bandsaw Maintenance

Before undertaking any sort of maintenance on these heavy machines – make note of the guidelines presented in the owner’s manual and follow all appropriate safety procedures.

The bandsaw blade should go through a tension test every day. Do not skip this step and start up the machine without giving it a once over. If the blade needs to be changed, be sure to follow the tension guidelines from your owner’s manual.

Other aspects that need to be inspected daily include the oil level and the hydraulics system. Be sure that there is plenty of lubrication and that there is no buildup or residue left behind on the bearings. If you have a chip removal system, check that the conveyor is working properly. As a last step in your daily check – make sure all the fluids levels are correct.

Manufacturers recommend that you monitor the maximum and minimum band speeds every week to ensure consistency.
Every time you change out the blade on your bandsaw check the alignment of the bank wheels. This will ensure that blade is rotating smoothly when in use.

Take some extra time every six months to check the moving parts with a longer lifespan. Inspect the wheel bearings to see if there is any unusual movement. If you notice something is off, replace the bearings.

Examine the drives and band guides for wear and replace if needed. Making notes and referring back to past notes may
identify potential issues that could cause downtime and high repair costs if left unaddressed.
Additional areas to inspect include the transmission oil level, bearings, seals, drive wheel, pulleys, belts, and vises. Top off the
transmission oil if it’s low, replace damaged seals and bearings, and make sure the drive wheel isn’t overly worn down.
Pulleys should all be aligned and at the appropriate tension with minimal signs of wear. Belts should be free of cracks and stretch marks, and both the movable and stationary vises should have minimal wear in order to pass the inspection. Also, keep in mind that the vises need to be aligned to the bandsaw blade and adjusted as needed.

About Dake
Since 1887, Dake has been a trusted name in manufacturing. Dake tools have been passed down for generations for their reliability and durability. Today, their product line has expanded beyond hydraulic and arbor presses to include; bandsaws, cold saws, drill presses, laboratory presses, and more.

Shop for your next Bandsaw:

[maxbutton id=”9″]

The Section 179 Deduction

This is the time of year businesses start exploring the advantages of section 179 of the tax code and Bonus Depreciation. The interest gets more intense as the year comes to an end. It is best to start year end planning NOW to make year end deliveries on machine tools.

David Goose of Commercial Credit Group understands this process better than most and has provided Fox Machinery’s customers with guidance for the past 12 years. As a part of his whitepaper entitled “The New Tax Law & Its Impact On Equipment Financing,” Goose reviews the new tax laws, laying out:
• Section 179 and Bonus Depreciation
• Corporations and Pass-through Entities
• Tax Deductible Business Expenses
• NOL, AMT and LKE

You are encouraged to DOWNLOAD and read the full whitepaper, however; we want to touch on one aspect in detail – Section 179.

What is Section 179?
Section 179 allows eligible small to mid-sized businesses to take additional tax deductions and depreciation, based on the purchase of qualifying equipment. These deductions effectively reduce the amount of a company’s taxable income, thus reducing the overall tax burden. There are restrictions and limitations, so if your company is thinking about taking advantage of Section 179 there are some important considerations you should be aware of as you engage in year-end planning.

A Compelling Benefit
Because this write-off can have such a significant impact on a company’s taxes, lets review how Section 179 works and how it can benefit your company. Let’s say your business has a taxable income of $250,000, and purchases a qualifying $250,000 machine. The purchase could effectively bring your taxable income to zero. If you’re in a normal or minimal tax environment this can mean an actual cash savings of around $50,000 or more.

Scheduled to expire in 2023, the change in Section 179 has already had economic impact. With the end goal to grow the US job market, taxpayers are encouraged to spend on equipment useful for manufacturing and building businesses. According to the Equipment Leasing & Finance Association, investments in equipment/software are expected to double in 2018, landing somewhere around 9%. Reports predict a 2.7% economic growth rate this year – powered by the financing and leasing of machinery and equipment.

The new tax plan contains several provisions that will impact equipment procurement – lower tax rates for businesses, non-deductibility of interest expense for C corporations, limiting like-kind exchanges to real property, and expensing of depreciable assets instead of writing them off over years. The key is to know how these changes may impact a company’s balance sheet, financial plan, and tax strategy, and to adjust accordingly to help improve the company’s financial performance.

Consider having discussions with your accountant, operations team and Fox Sales Engineer before the third quarter. A clear understanding of what technology and machine functionality will have the greatest impact will keep your business in line with your competition.

Want to know more?
CLICK to read a free whitepaper published by the pros: “Tax Cuts and Jobs Act” – an interview conducted by Mark Lempko and Don Pokorny, both of Commercial Credit Group Inc. (CCG), with Dixon Hughes Goodman LLP (DHG).

The information conveyed herein is meant to be informative and should not be construed as specific tax advice.

[maxbutton id=”9″]

Shear Preventative Maintenance Schedule

Keeping a consistent eye on your machine is the easiest way to minimize downtime and maximize productivity. Manufacturers often recommend conducting preventative maintenance on shears by interval hours. This document is a general outline. Fox Machinery and Welmaintained encourage our customers to use this as a starting point to develop a plan based on your machine’s usage.

Shear Preventative Maintenance Schedule